The registration form in OpenCart is long: first name, last name, e-mail, phone, password entered twice. Some customers abandon it halfway, and others can't remember their password later and write to support. The Jet Reg module from the developer markimax adds a "Sign in with Google" button: the customer clicks it, confirms the account, and an account in the store is created automatically, already linked to Google. After that, signing in also takes one click, with no password for the store. Let's go through the admin panel.
Connecting Google: instructions right in the admin panel
Most questions with such modules usually come not from the module itself, but from Google Cloud Console. Here the developer has put step-by-step instructions directly on the settings page, so you won't have to look for manuals separately.
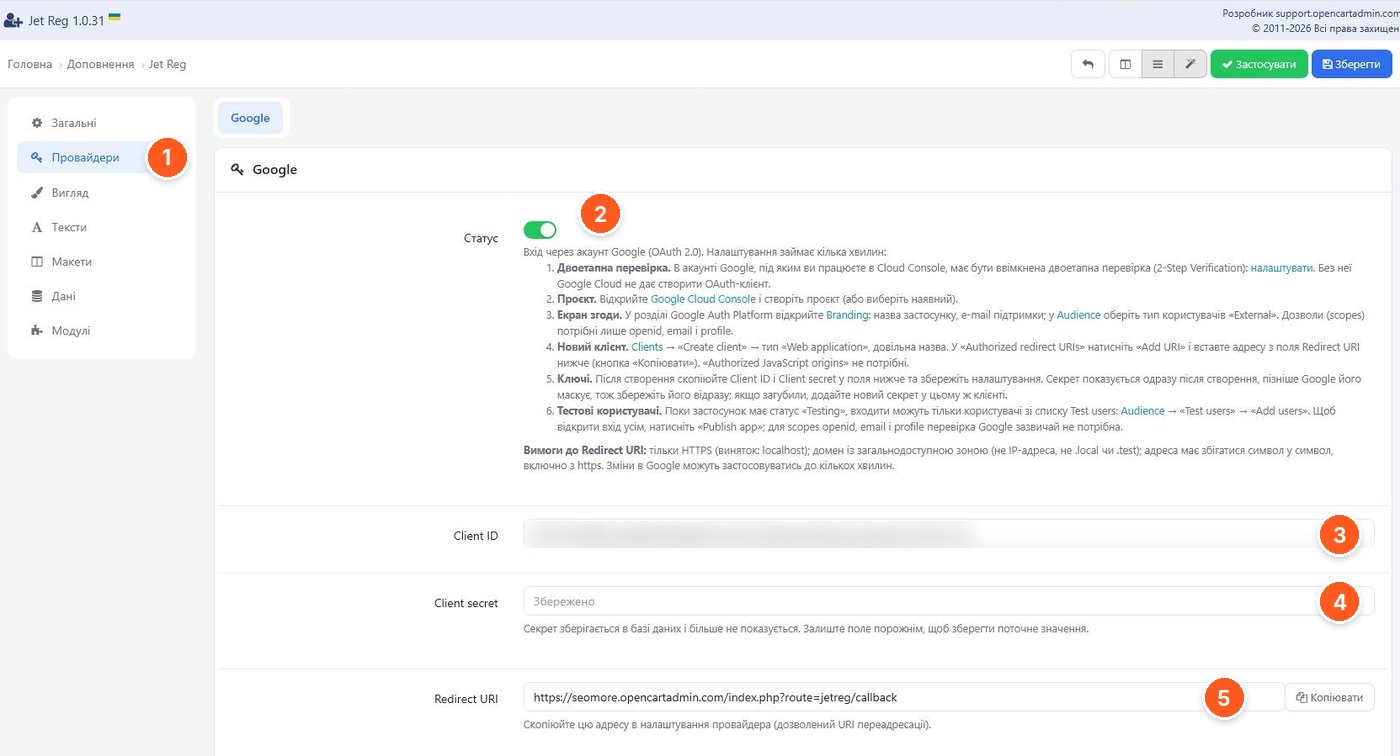
- Module menu. Seven tabs: general, providers, appearance, texts, layouts, data and modules.
- Status and step-by-step instructions. Two-step verification in the Google account, a project in Cloud Console, a consent screen with the openid, email and profile scopes, creating a client of the "Web application" type, keys and test users. Requirements for the Redirect URI are described separately: HTTPS only, a public domain, exact match character by character.
- Client ID from Google Cloud Console.
- Client secret. Stored in the database and no longer displayed. If the field is left empty, the saved value will not change.
- Redirect URI with a "Copy" button. You paste it into the client settings in Google.
A useful detail from the instructions: while the application in Google has the "Testing" status, only test users can sign in. For the button to work for all customers, the application must be published with the "Publish app" button.
Button appearance
The sign-in button sits in the header or in the login form, so it should look like part of your template, not a foreign insert. There are enough settings for this.
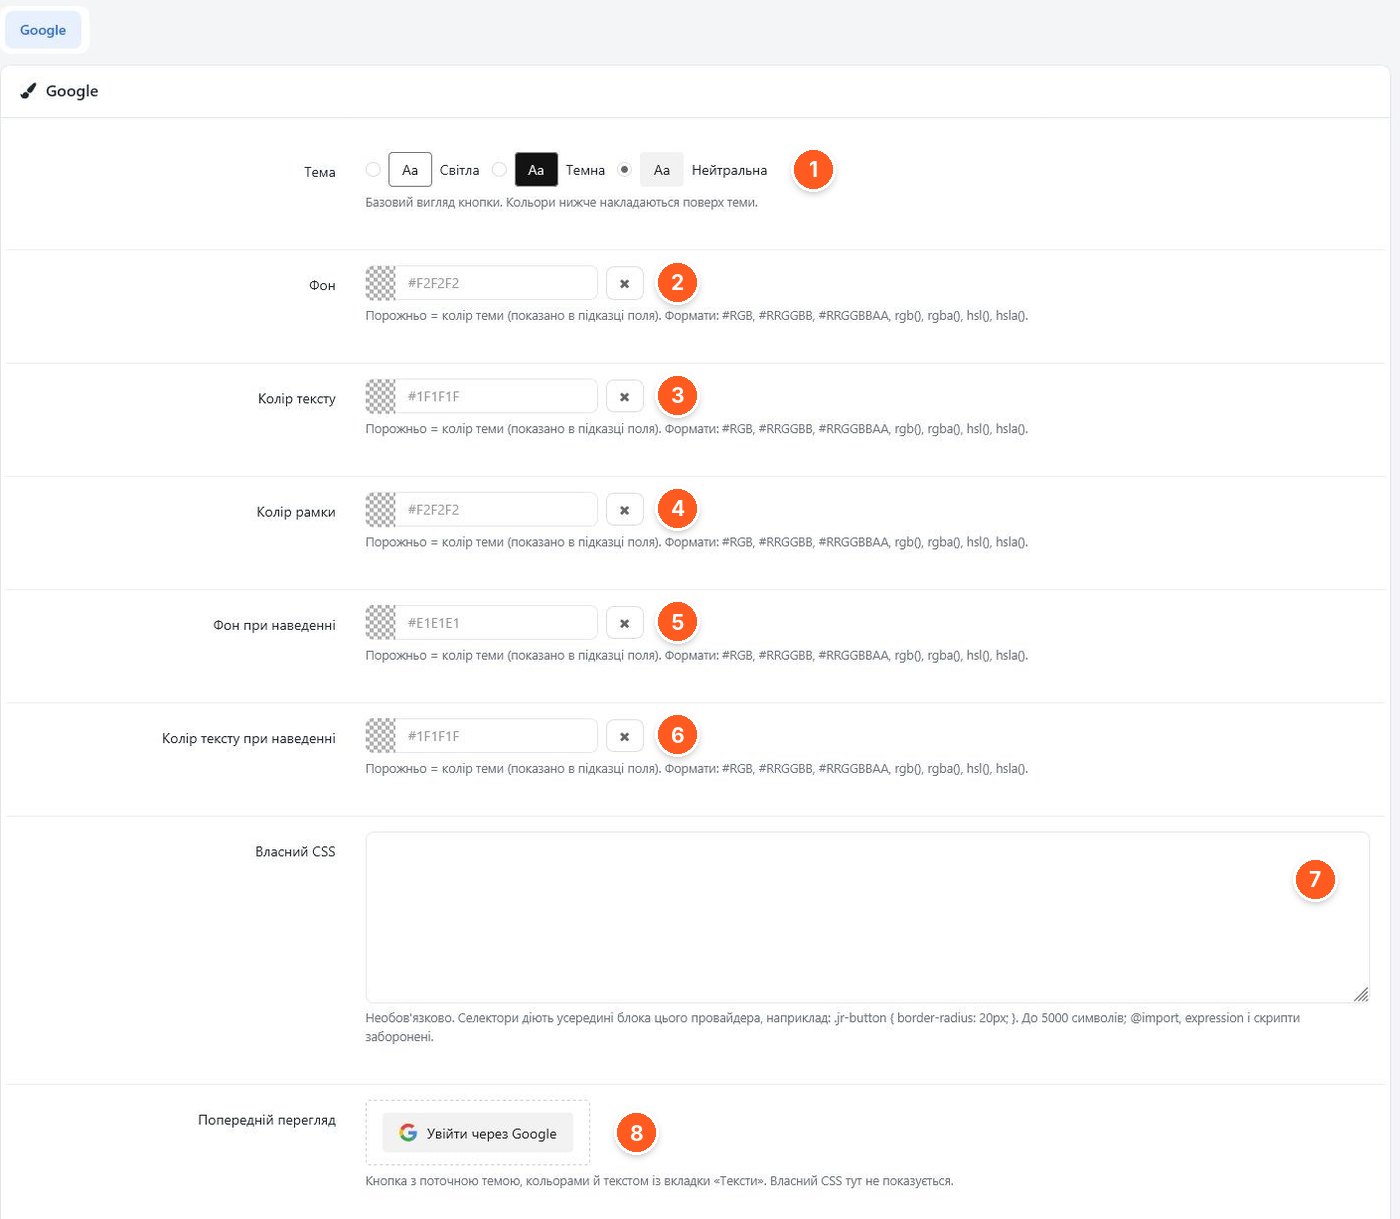
- Theme: light, dark or neutral. This is the base look; the colors below are applied on top of it.
- Background color.
- Text color.
- Border color.
- Background on hover.
- Text color on hover. All colors accept #RGB, #RRGGBB, rgba() and hsl() formats. An empty field means the theme color.
- Custom CSS up to 5000 characters. Selectors apply only inside the button block, so the template will not be affected. @import and scripts are prohibited.
- Preview of the button with the current theme, colors and text.
Button text for each language

- Store language tabs. Text is set separately for each one.
- Button text. If the field is empty, the module will show the standard "Sign in with Google".
Where to show the button
The most interesting screen for those who install modules themselves. The button can be displayed in the standard way, at a layout position, or embedded into any template element using a CSS selector.
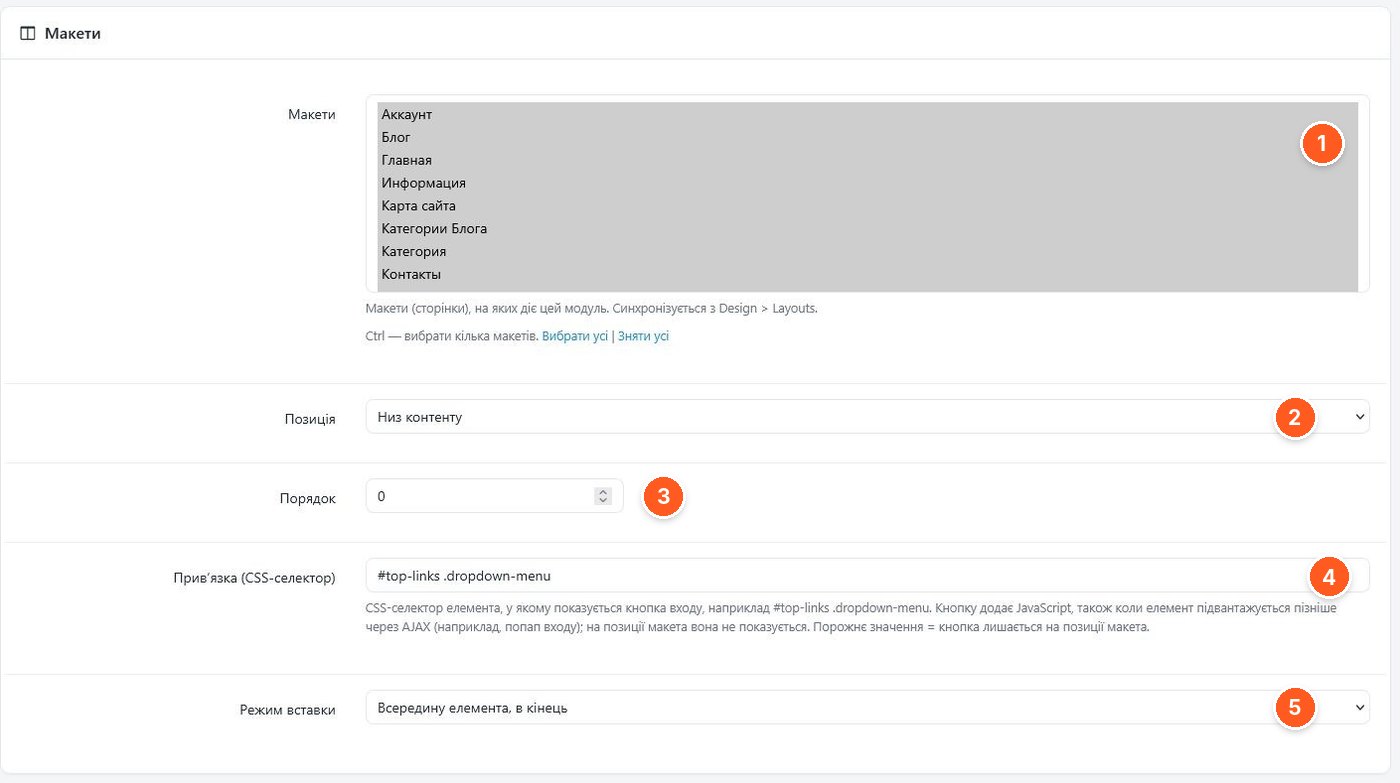
- Layouts (pages) where the module works. The list is synchronized with "Design → Layouts", and there are "Select all" and "Deselect all" buttons.
- Position in the layout, for example the bottom of the content.
- Sort order among other modules in this position.
- Binding by CSS selector. For example,
#top-links .dropdown-menuadds the button to the "My Account" dropdown menu in the header. The button is inserted by JavaScript, so it will appear even in a login popup loaded via AJAX. - Insertion mode, for example inside the element at the end.
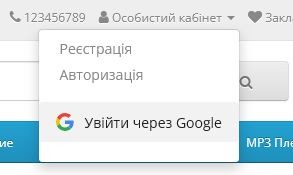
This is how it looks on the storefront with a standard header: the button became a separate item in the account menu, below "Register" and "Login".
Connecting to the template without editing the theme
A separate tab shows how exactly the module integrates with the store. This is worth checking before installation if your template is heavily modified.
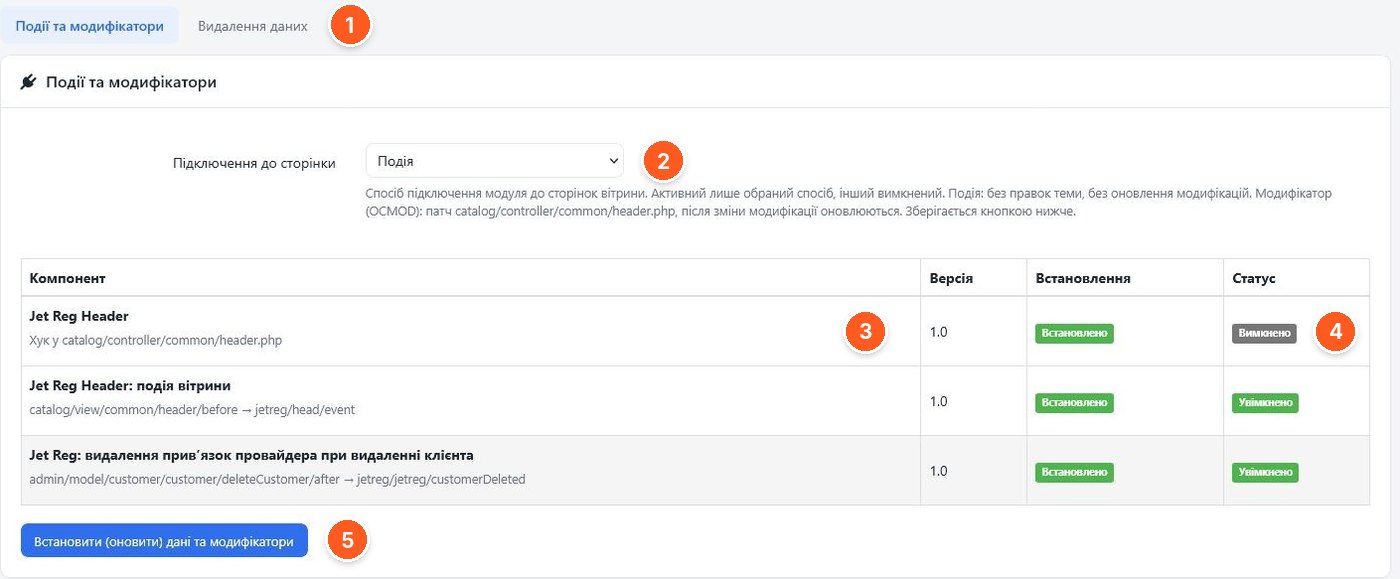
- Deleting module data is moved to a separate tab.
- Method of connecting to storefront pages: an event (without editing the theme and without updating modifiers) or an OCMOD modifier that patches
catalog/controller/common/header.php. Only one chosen method works at a time. - Module components with versions: the header hook, the storefront event, and the event that removes the Google link when you delete a customer in the admin panel.
- Status of each component. In the screenshot the modifier is disabled because the event connection is selected.
- Install and update button for data and modifiers.
Multiple module instances

- List of instances. The screenshot shows two: "Jet Reg" and "Jet Reg-Account".
- Copying and editing. Each instance has its own settings, so you can, for example, show one button in the header and another, with a different design, on the account page.
- Add a new instance. There are no limits on the number.
What to consider before purchasing
- Works on OpenCart 3.0.x and ocStore 3.x. ionCube is not required, and the module does not contact the developer's server.
- So far only Google. The tab is called "Providers", but the screenshots and the description only mention Google.
- HTTPS is required and a public domain: Google will not accept a Redirect URI with an IP address, a local zone or without https.
- Setup in Google Cloud Console takes a few minutes, but without two-step verification in the Google account the OAuth client will not be created.
- Screenshots were made on version 1.0.31, the current version is 1.3.42, so the interface may differ somewhat.
- "Turnkey" service: the developer offers installation and setup separately if you don't want to deal with Google yourself.
Who it suits
Jet Reg makes sense if you see that people reach registration and don't complete it, or if you have many repeat customers who reset their password every time. This is especially true for mobile traffic: on a phone, signing in via Google is much simpler than a form with five fields. If your customers mostly place orders without registering and never return to the account, the benefit will be small. About what else is worth improving in the customer account, we wrote in the article about the OpenCart customer account.
"Jet Reg" from markimax on the OpenCart Code marketplace. You can ask the developer about setup questions directly on the module page.